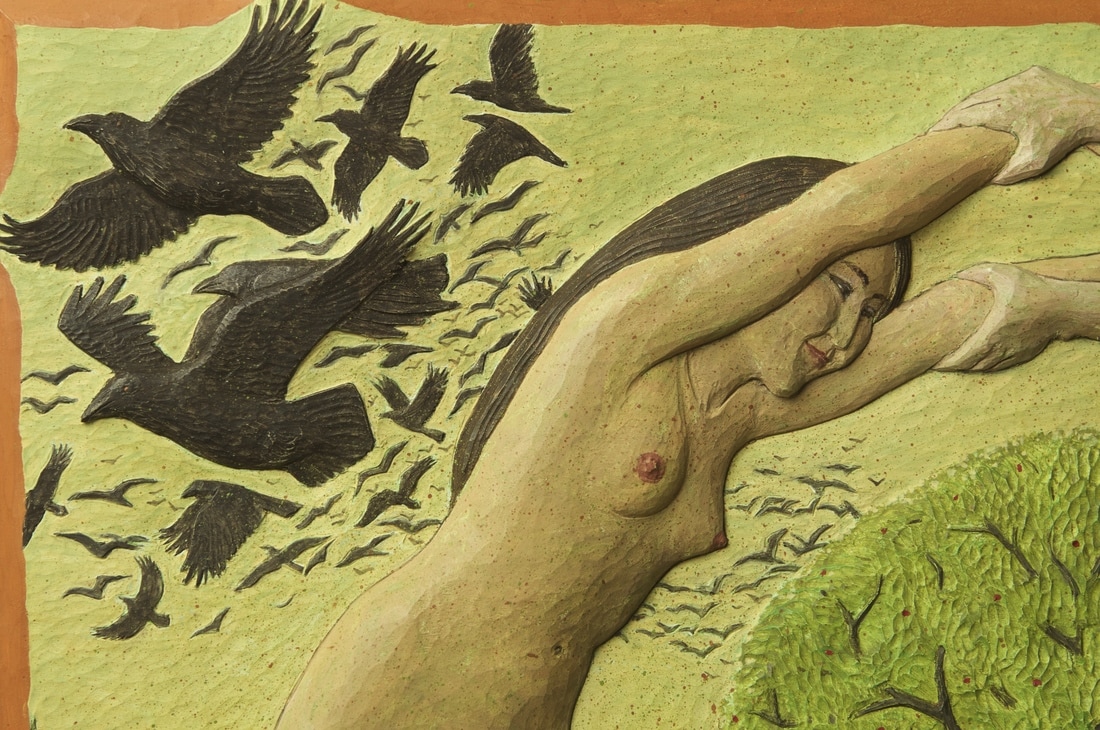
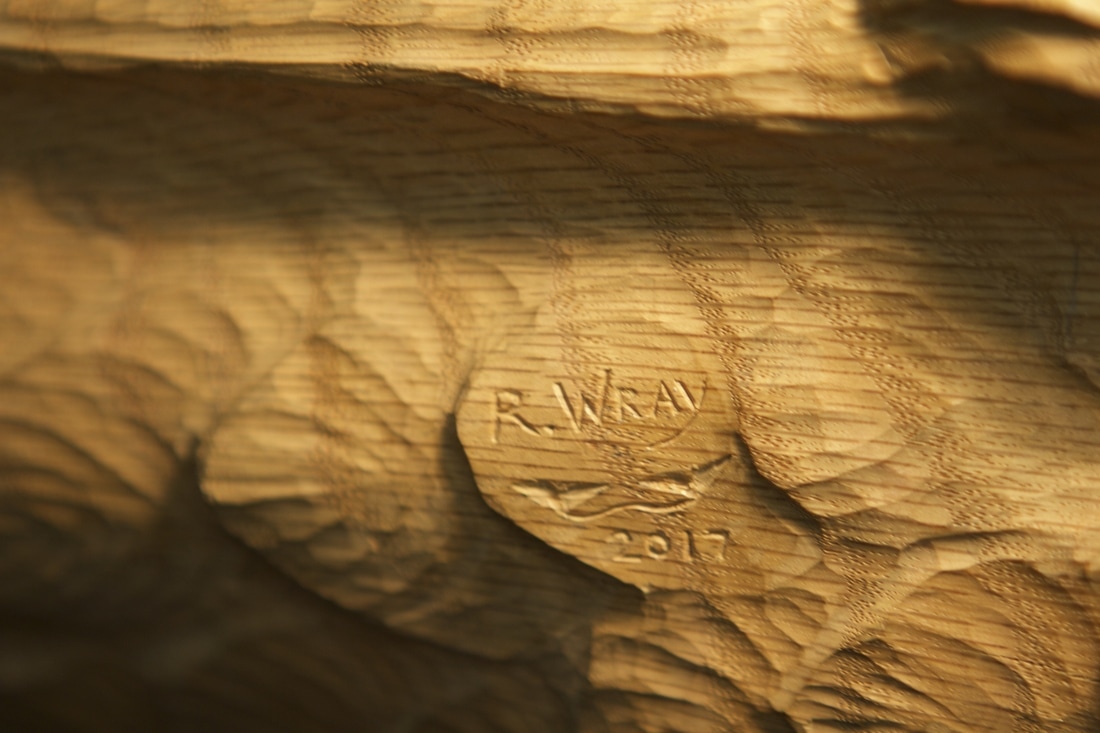
"Dance of Life" poplar, casein paint 13 1/2" h. x 20 1/4" w x 2"d.
Here is a detail of the newly finished relief. Now its time to begin plans for my next carving!
|
"Dance of Life" poplar, casein paint 13 1/2" h. x 20 1/4" w x 2"d. Here is a detail of the newly finished relief. Now its time to begin plans for my next carving!
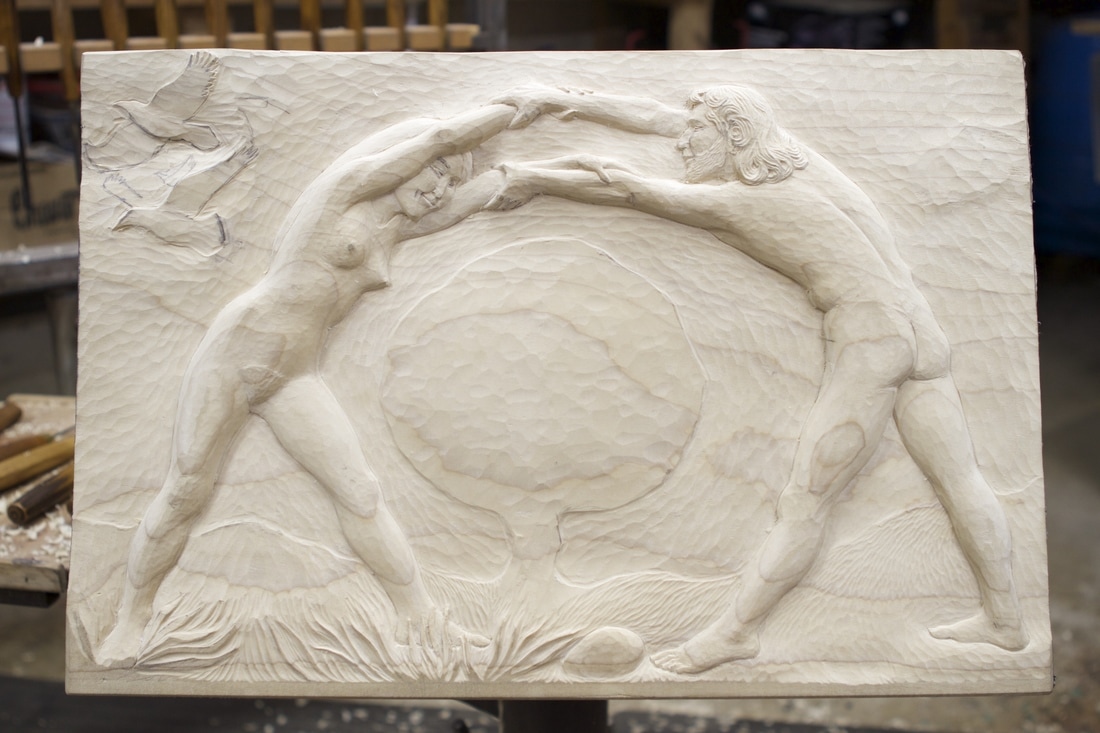 Things are beginning to take shape...and looking a little more "in the round". Carving in some of the closer birds in the flock. But still a ways to go....
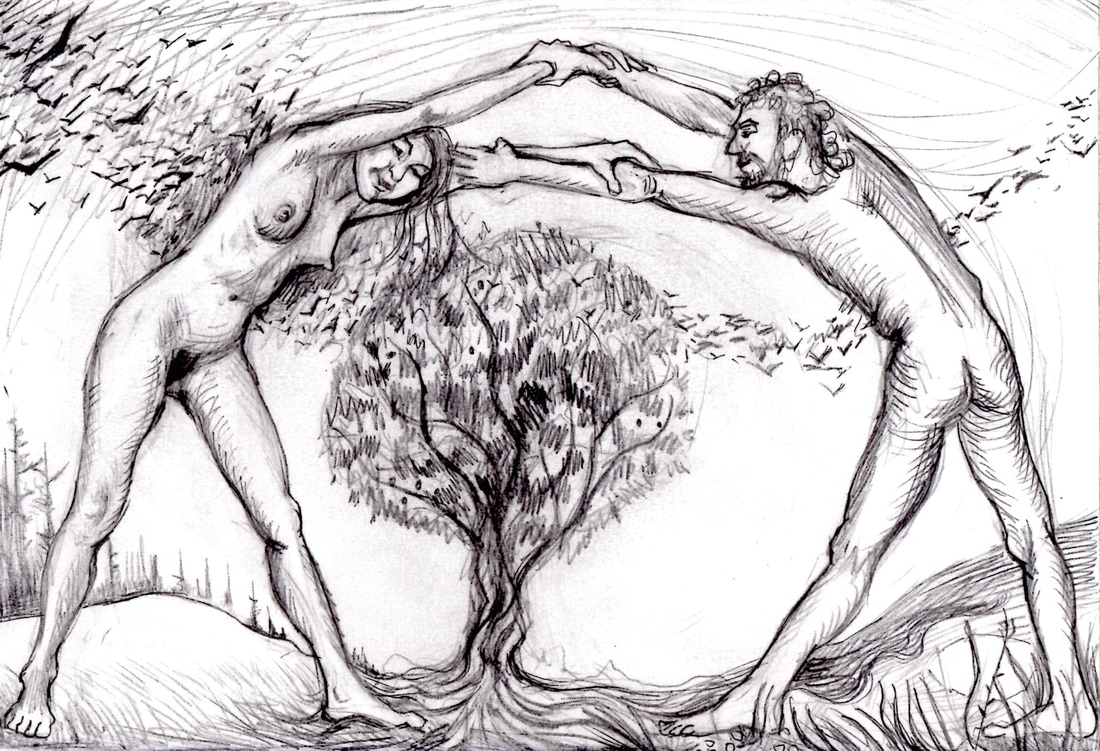 As I mentioned in the last post, I have been wanting to do some carvings in relief. For my first one, I decided to use this recent sketch I had done as a potential design for a drypoint ( and I still might use it for that too!). 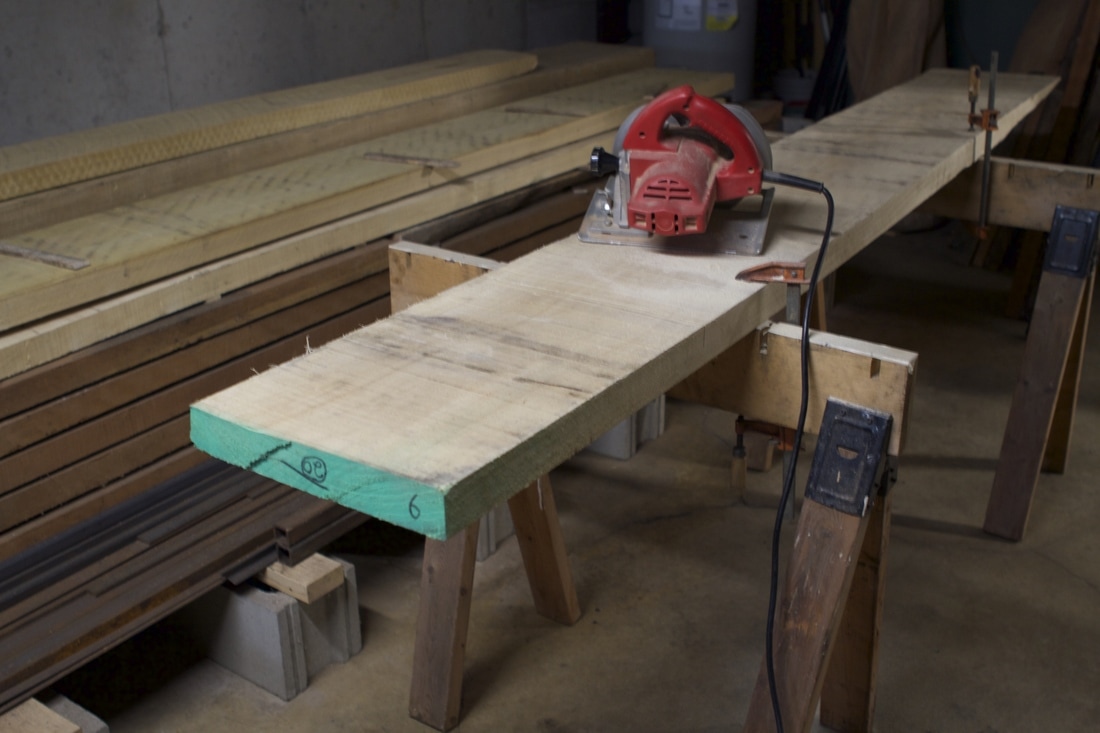 Cutting a piece of that nice wide poplar board to use for the relief carving... 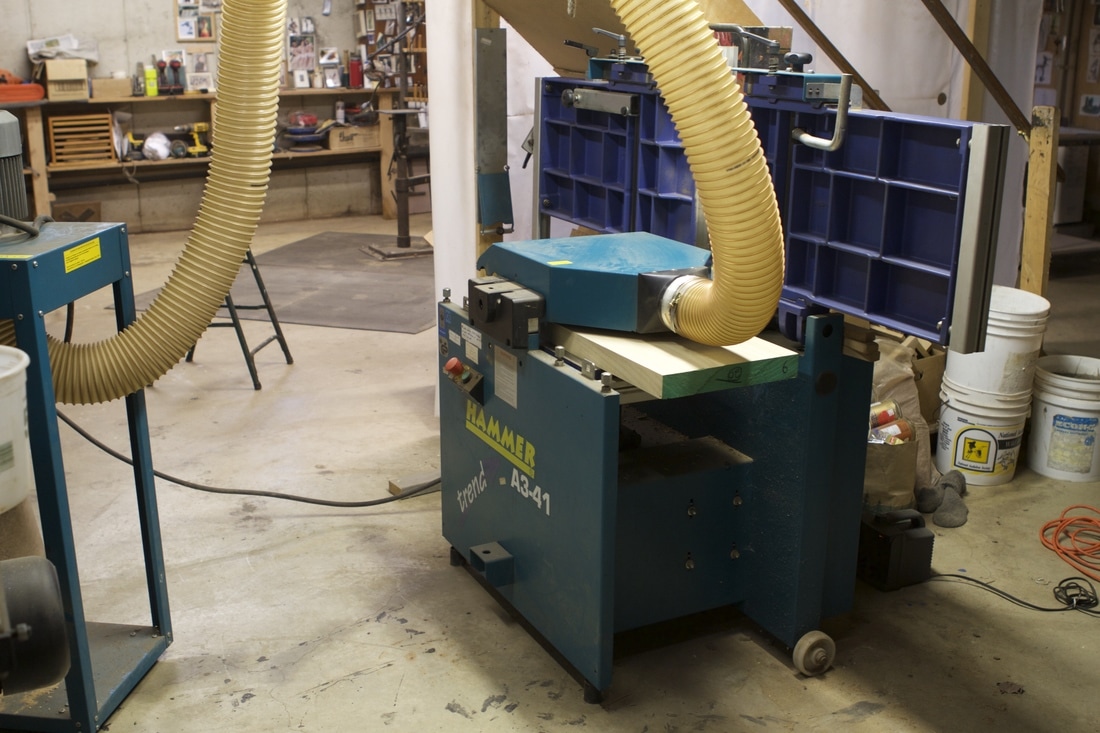 Taking the warp out of the board, and cleaning up the surfaces on my joiner/planer. 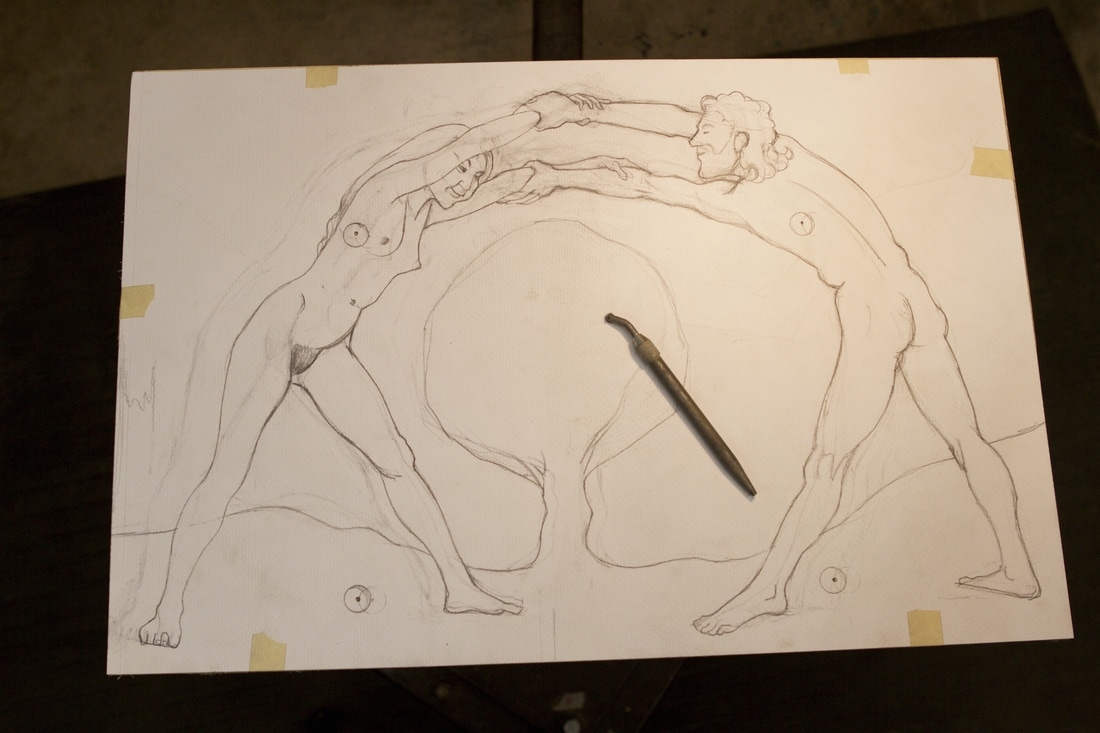 The next step is transferring the enlarged design (which I have changed a bit from the original sketch) to the board. I do this by going over the lines with a pounce wheel, which is shown in the photo. The four little circles you see mark the locations of the lag screw which attach the board from the back to the carving stand base plate. I chose those locations as the wood will remain fairly thick in those places, with little danger of carving down to the screw. 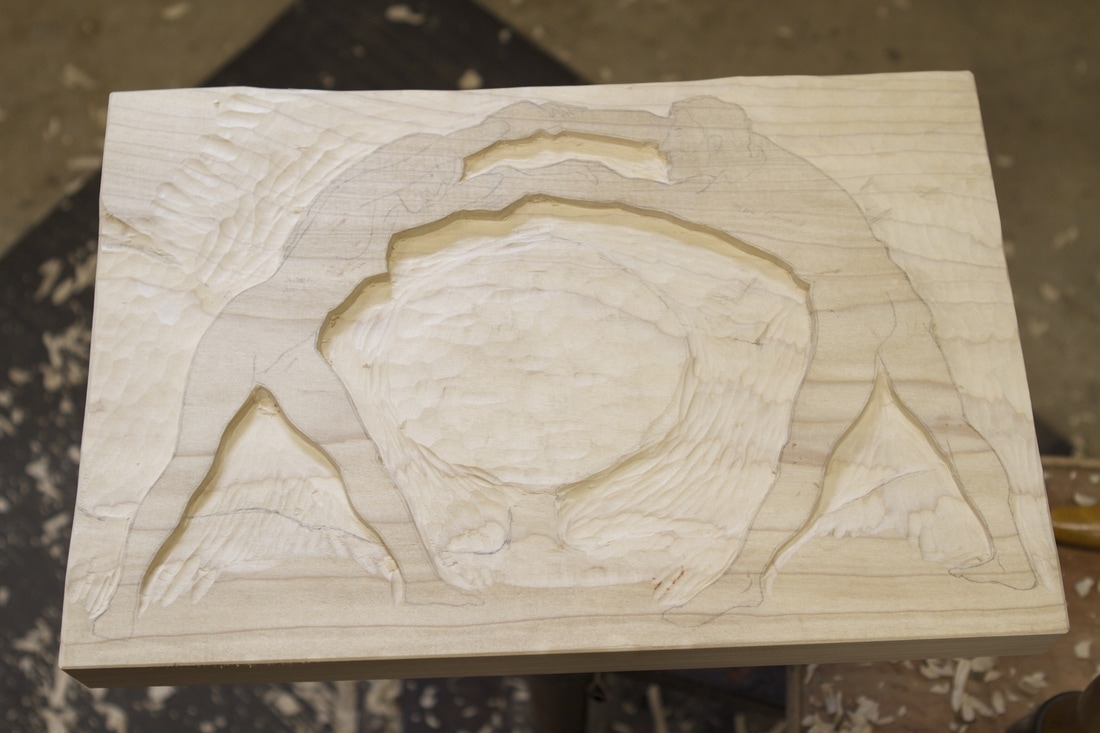 Now the carving has begun. Initially, I just carve the background areas down, leaving the figures at full thickness. 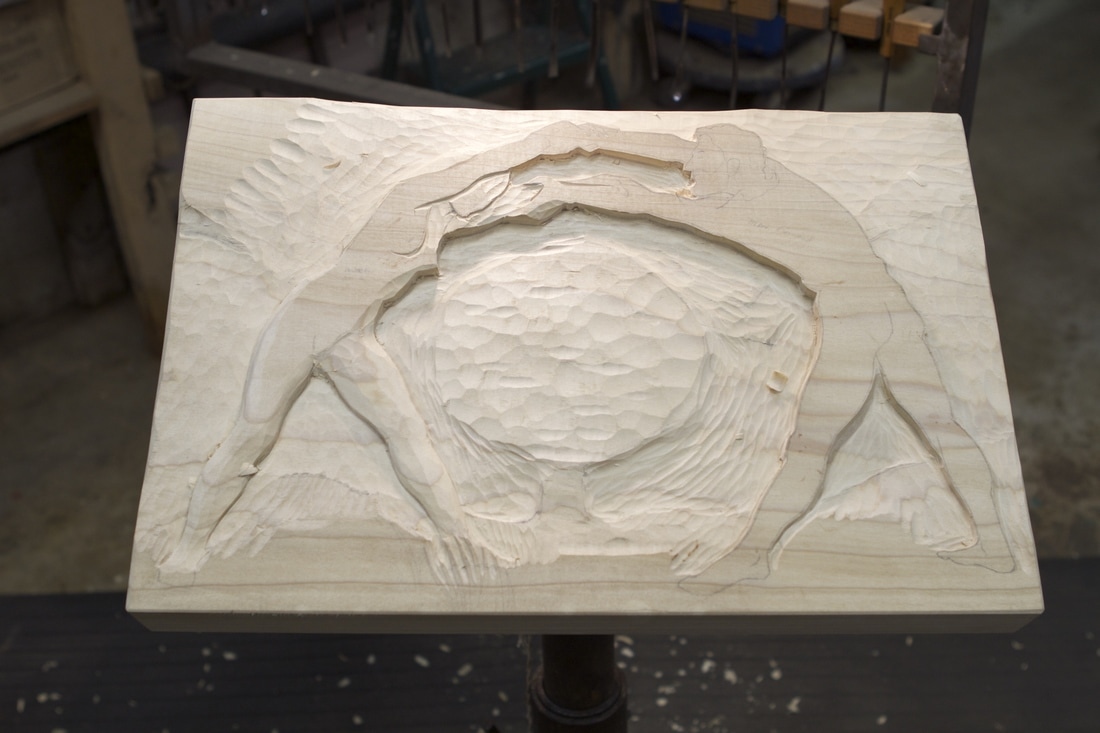 Then I begin rounding the forms in the figures. 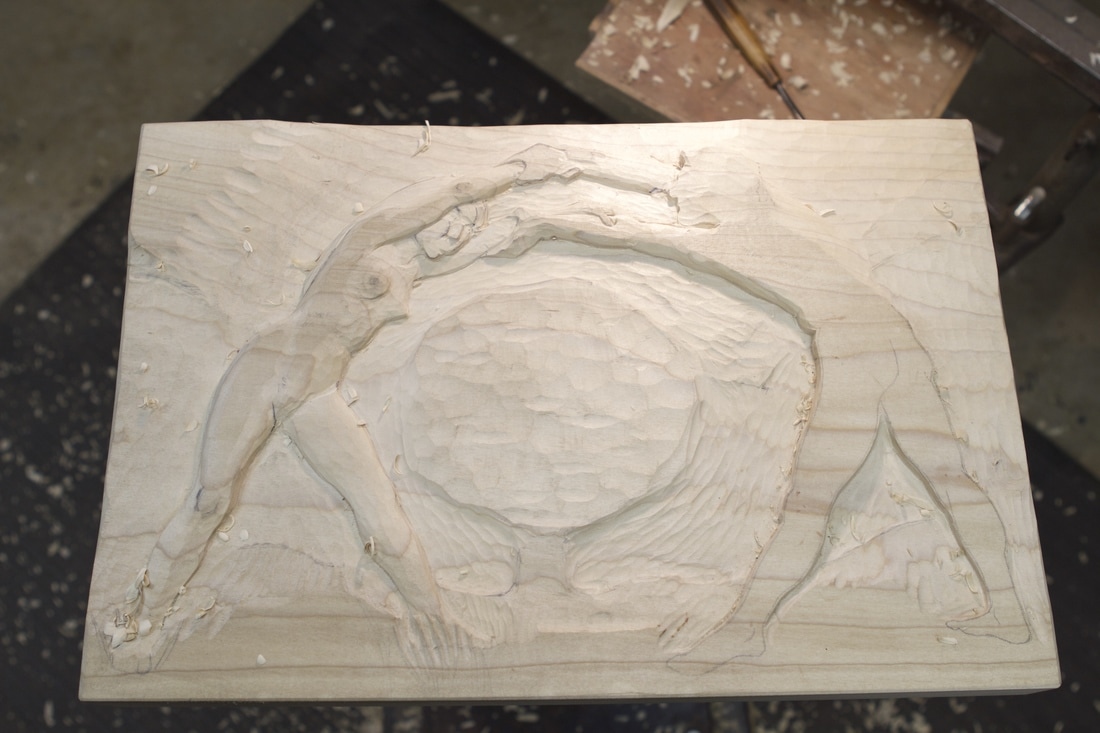 The challenge in carving relief is in making the figures appear to be in the round...Here I have just started. We shall see as the carving progresses...
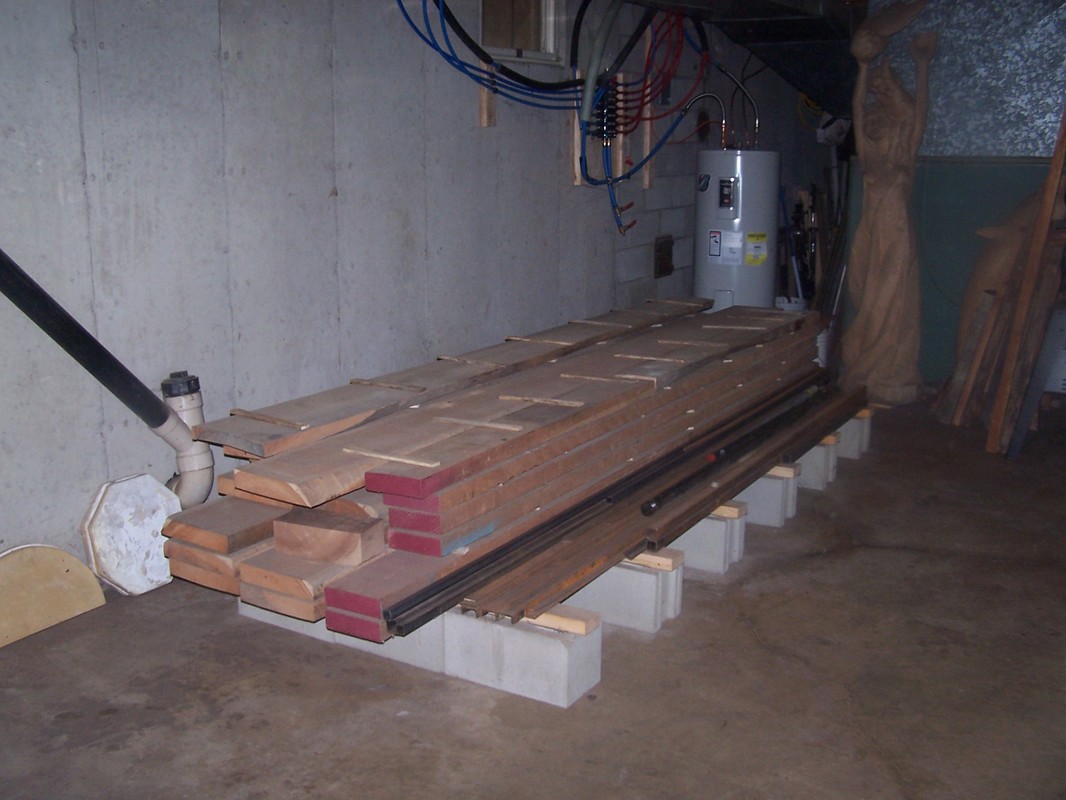 I have been feeling like I want to try doing more carved reliefs. I'm thinking maybe larger, but a little looser, and perhaps painted. Not wanting to use my cherry stock for this, Akemi and I recently took a little trip down to a wood dealer near Portland to see what they might have. There, I selected a few nice wide 8/4 poplar boards, and one really nice 16/4 board. Upon our return, I straightened up my carving wood stock in preparation for the delivery of my new wood.... 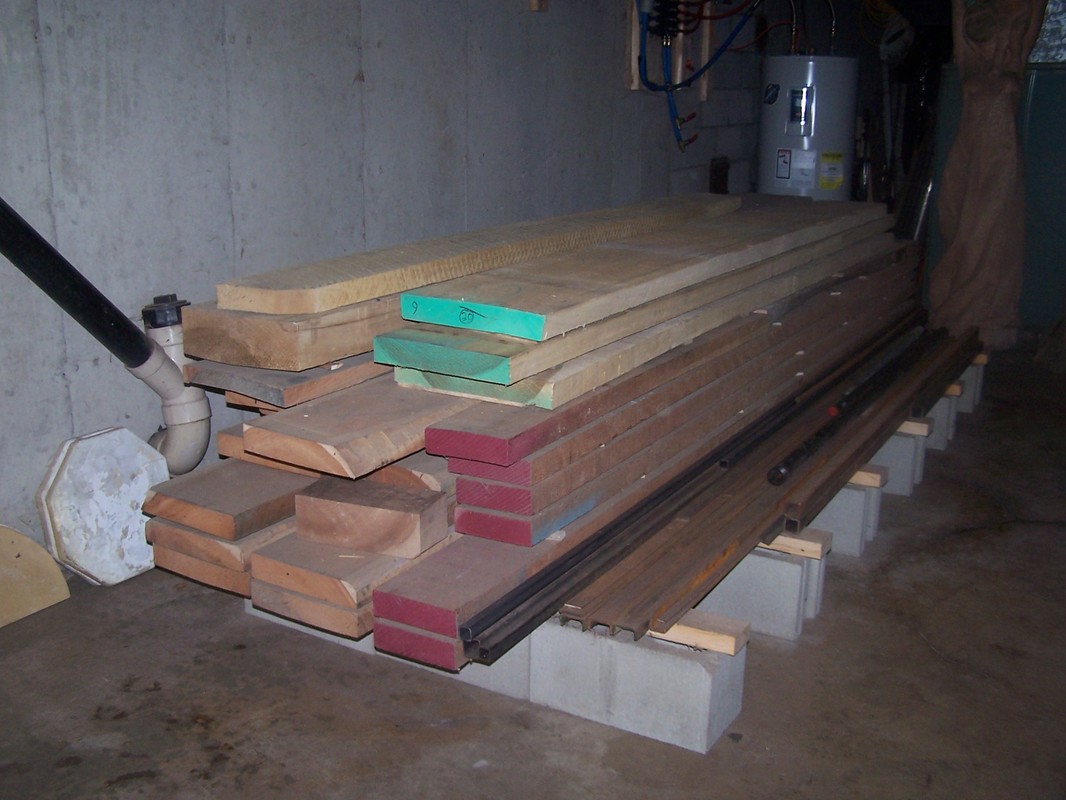 And this afternoon, the delivery truck arrived with my wood! Here you see my beautiful new boards added to the pile. Now...to work on the design for my first relief!
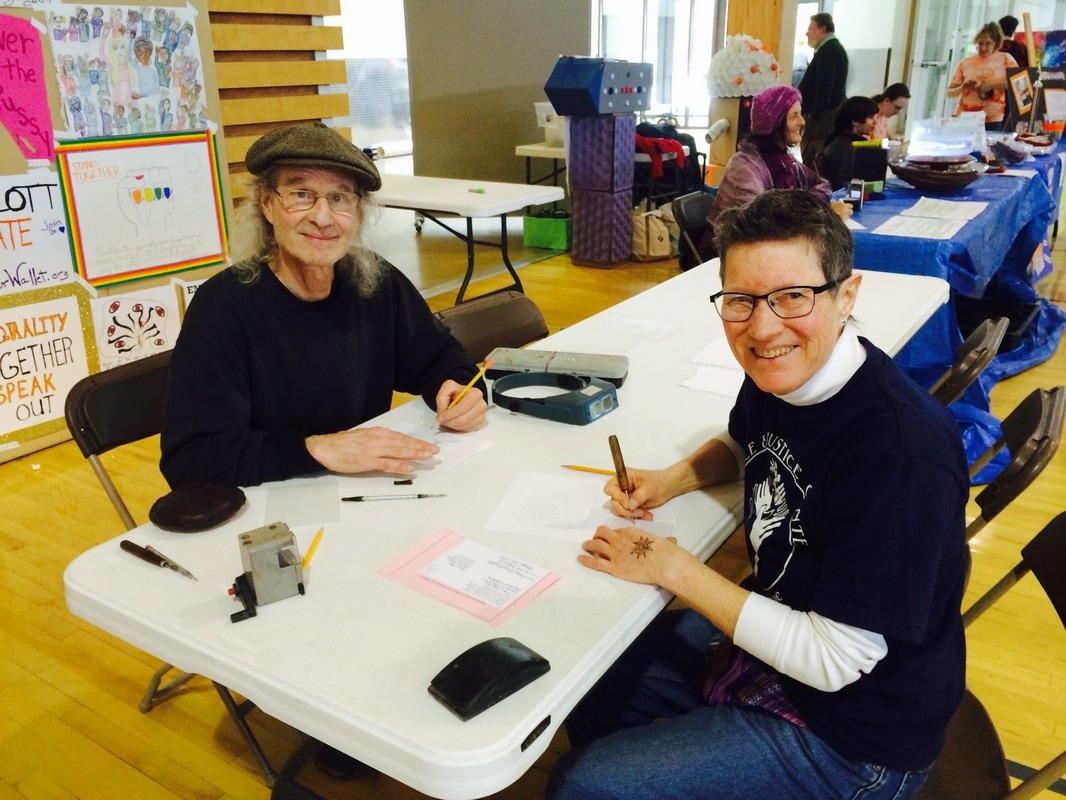 This past Saturday was the Peace and Justice Center of Eastern Maine's annual HOPE Festival. The theme of this year's festival was "Art and Social Change". This sounded good to me...and I was able to participate by showing anyone interested how to make a drypoint print. After scratching their own drawing onto a prepared plexiglass plate, I would take them through the printing process (I brought in my small but wonderfully portable old Blick etching press), and in the end, they would walk away with their own freshly printed drypoint print, and plexi plate. Before the festival I had worried a bit that maybe not many people would dare to try...but after Mary Karensdaughter (pictured above) from the P&J Center gave it a try, I had no chance to rest (or eat lunch), as folks enthusiastically followed Kaen's lead and took the drypoint plunge! 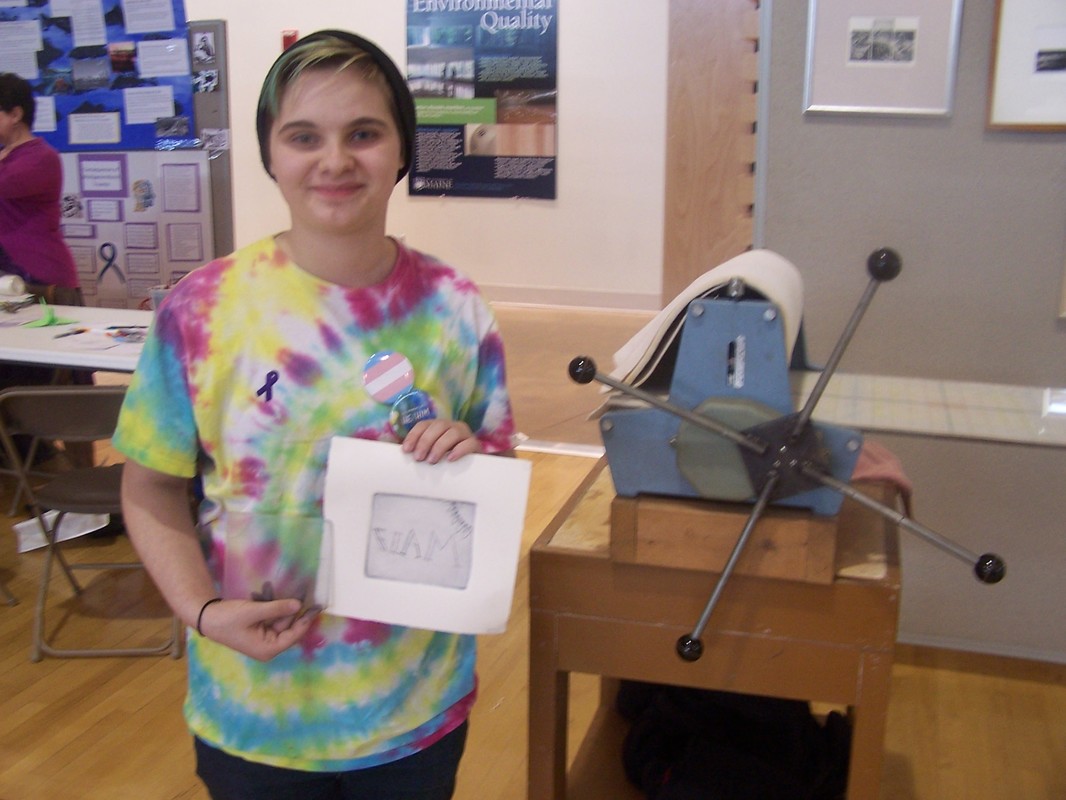 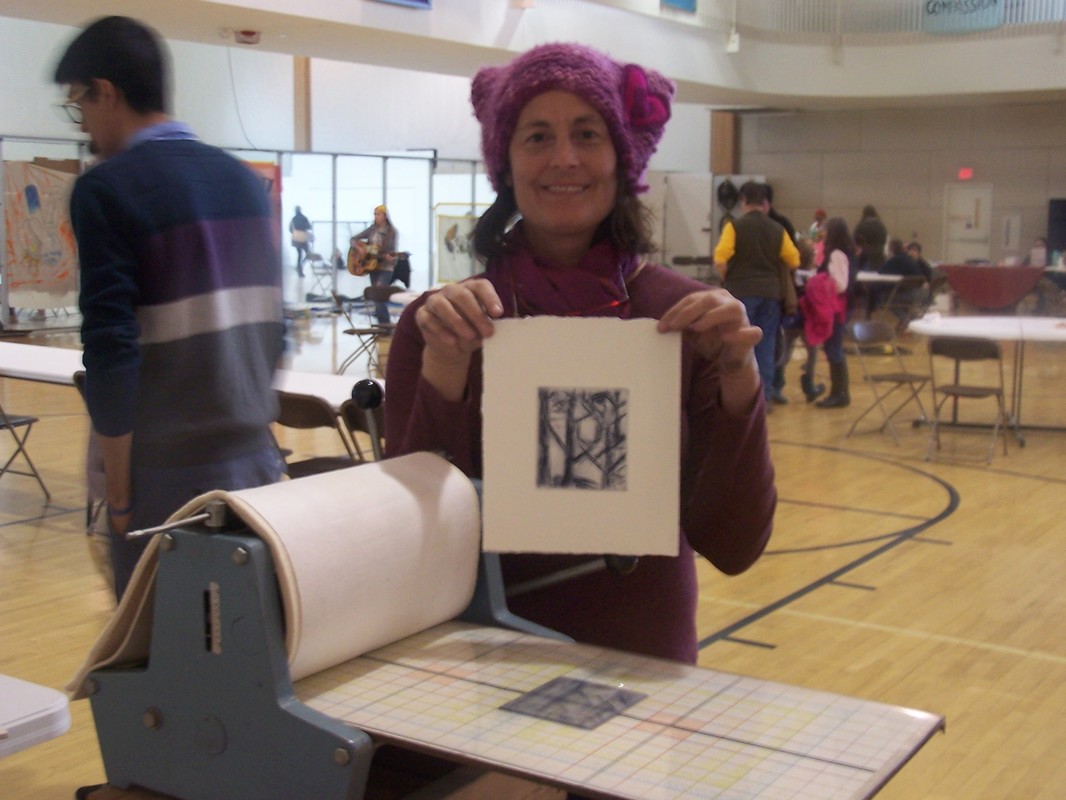 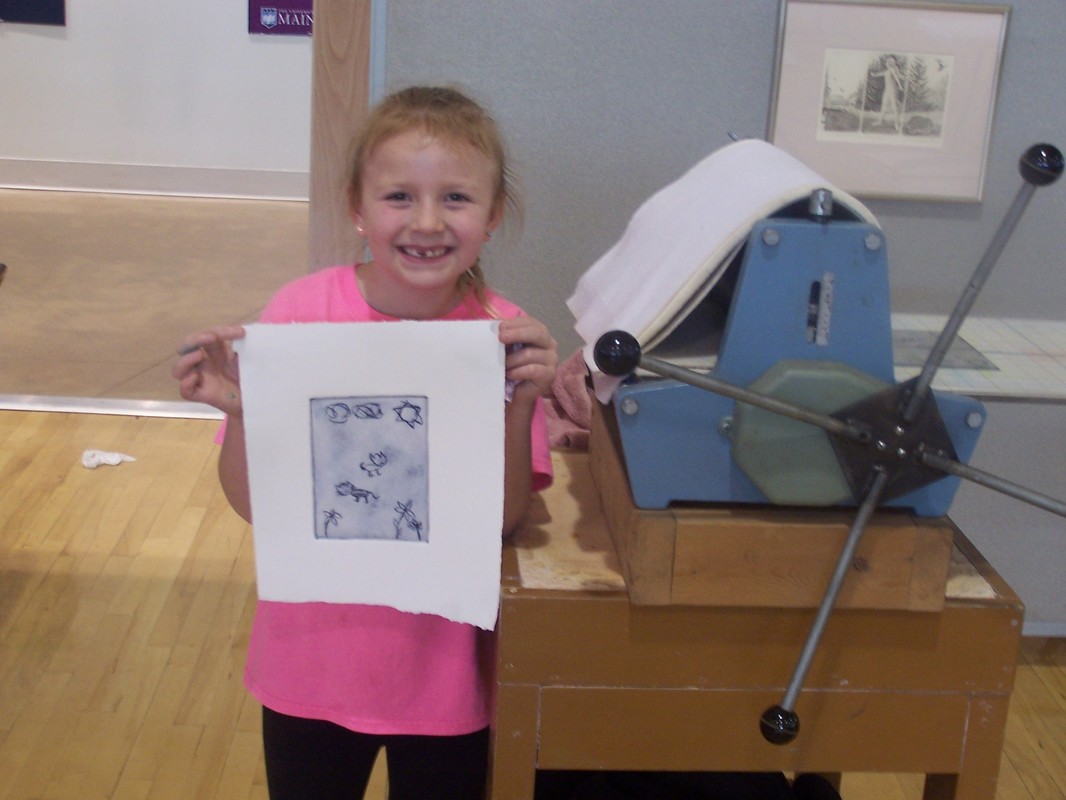 Here are just a few of those who took that plunge, with their finished creations... At the end of the festival, I was tired, but very satisfied.
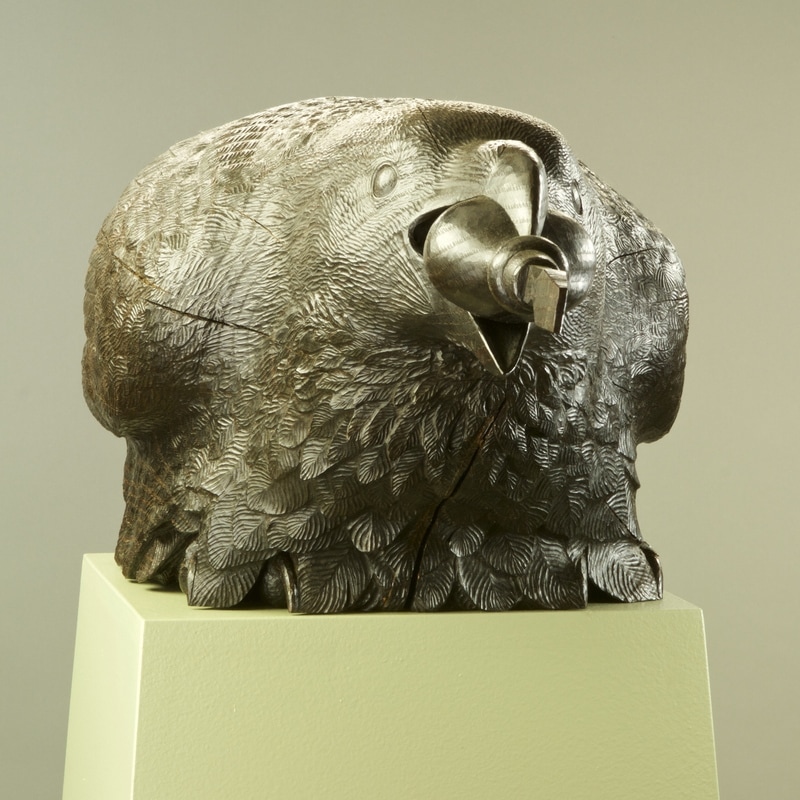
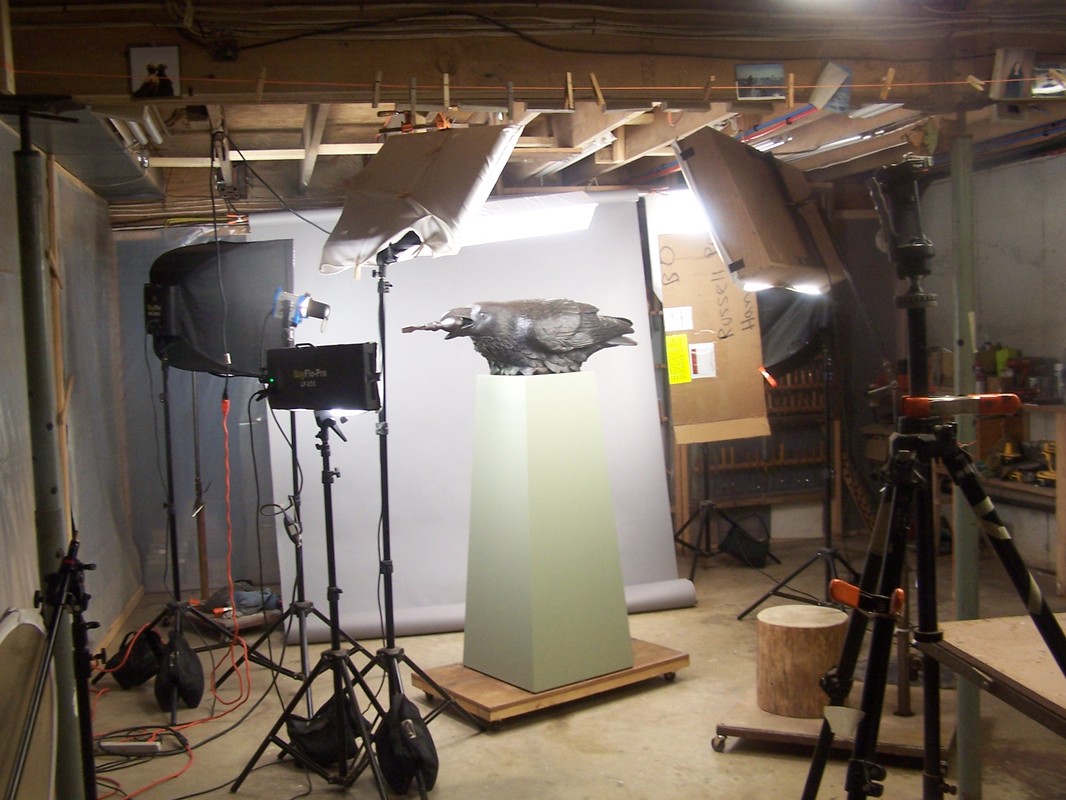 The carving is finished, the oil is dry, the pedestal is painted and dry...finally, its time to photograph the piece! The photography is not my favorite part of the sculpting process, but its a very important part. It is always a challenge for me...trying to find the right combination of lighting elements, and then placing them in the best positions. It is almost always the case that when positioning a light or lights to best show the form in one area of the sculpture, it isn't so good for another area. Its often the case that finding the best mix of lit and shadowed areas involves compromises. There are an infinite number of possible lighting setups, but having only finite time in life, one has to limit the number of setups! I'll often rearrange the lights 15-25 times for each position I photograph the piece from. Thats a lot of photos to sort through to try to find the best ones. But from out of all those photos, there will usually be a few usable ones. 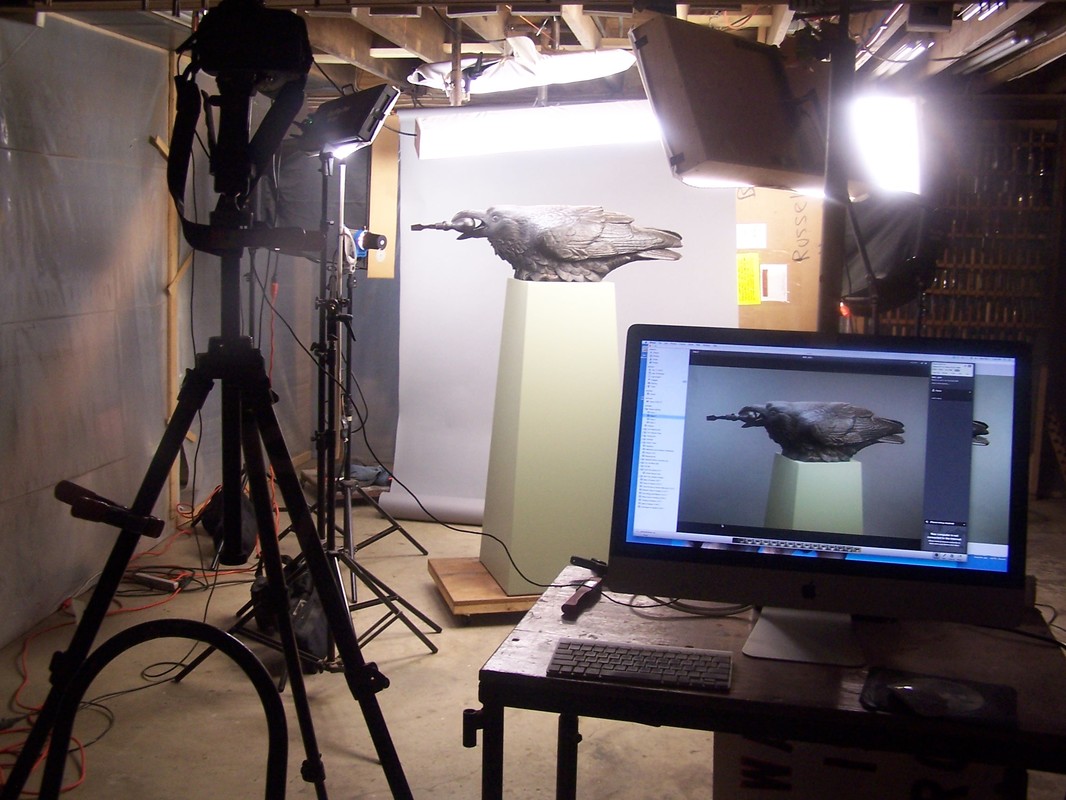 Another view of the "photography studio".
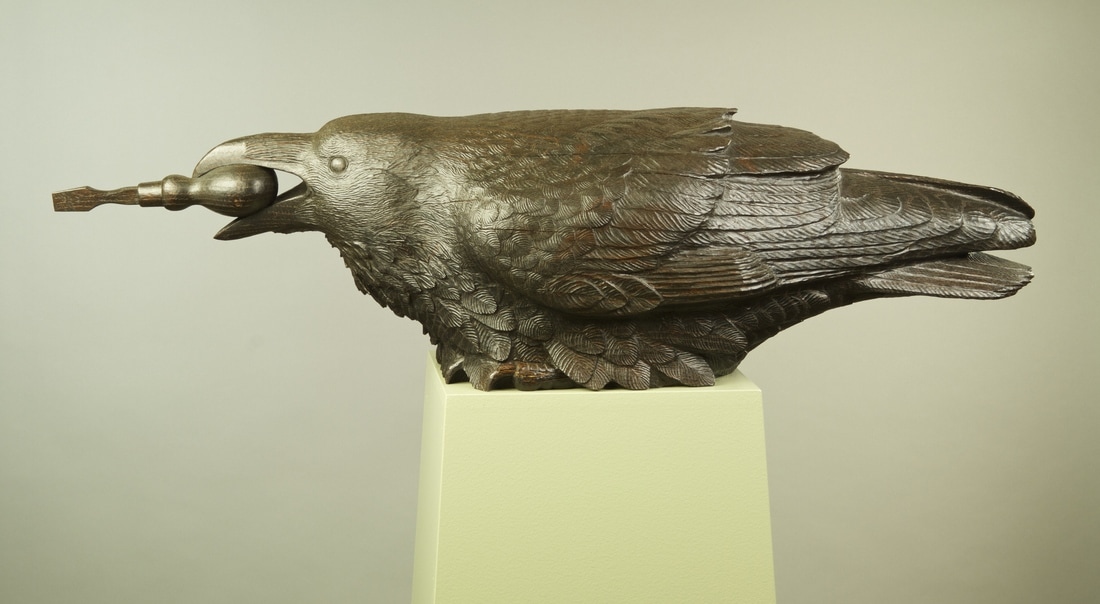
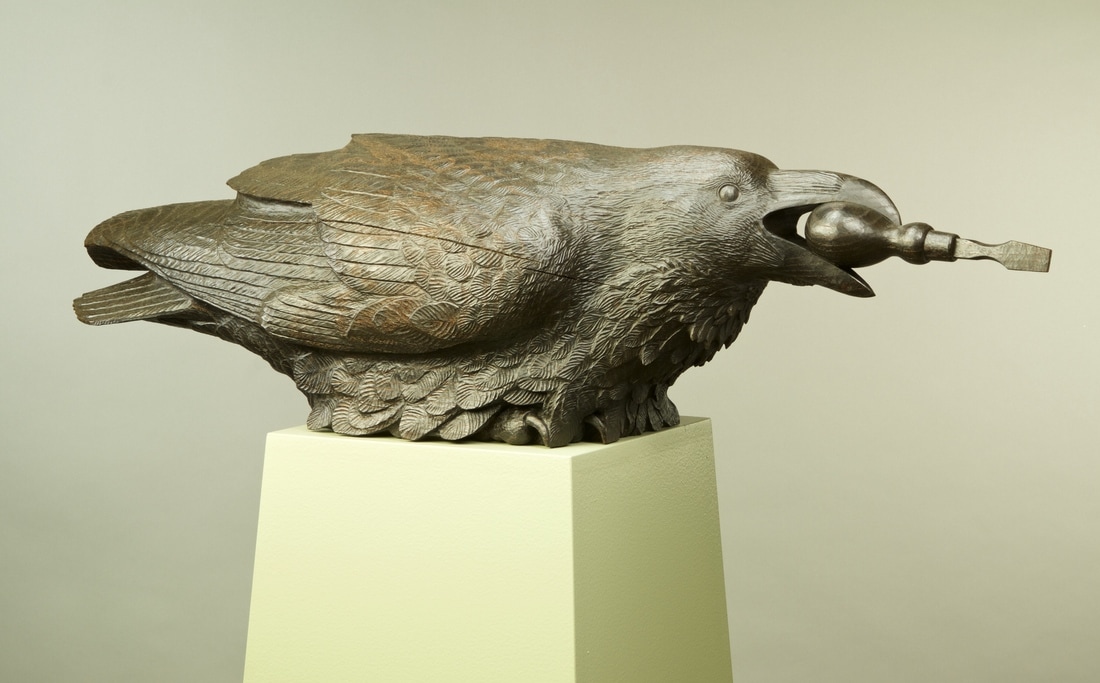
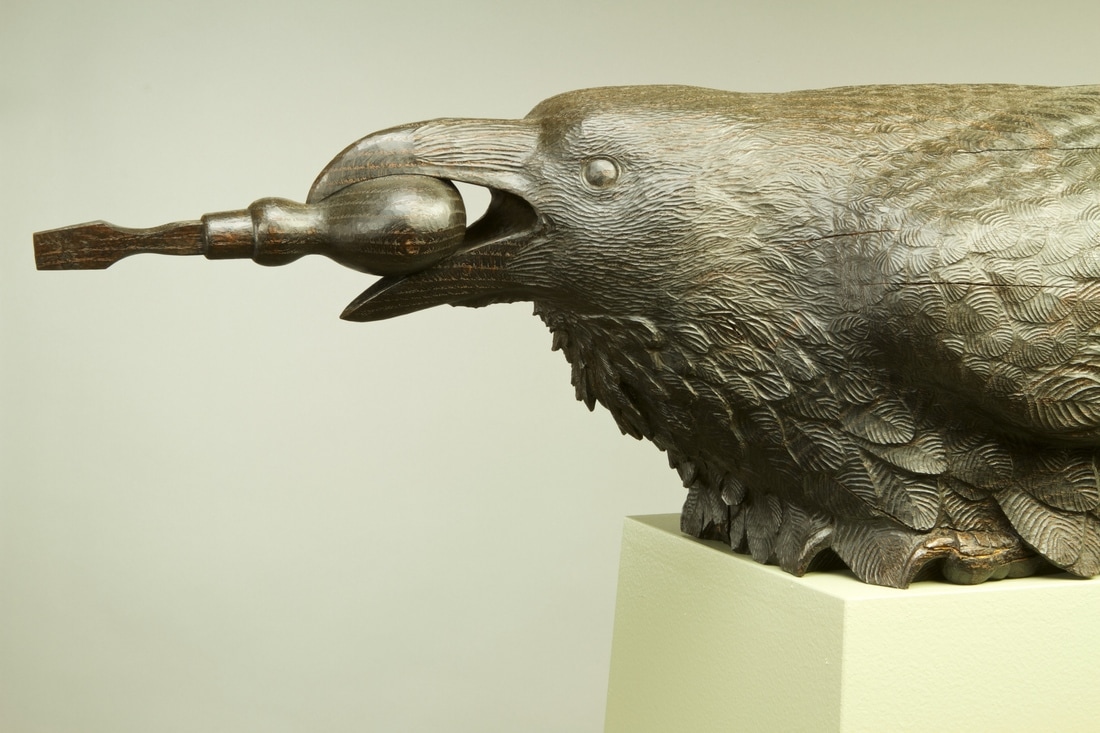
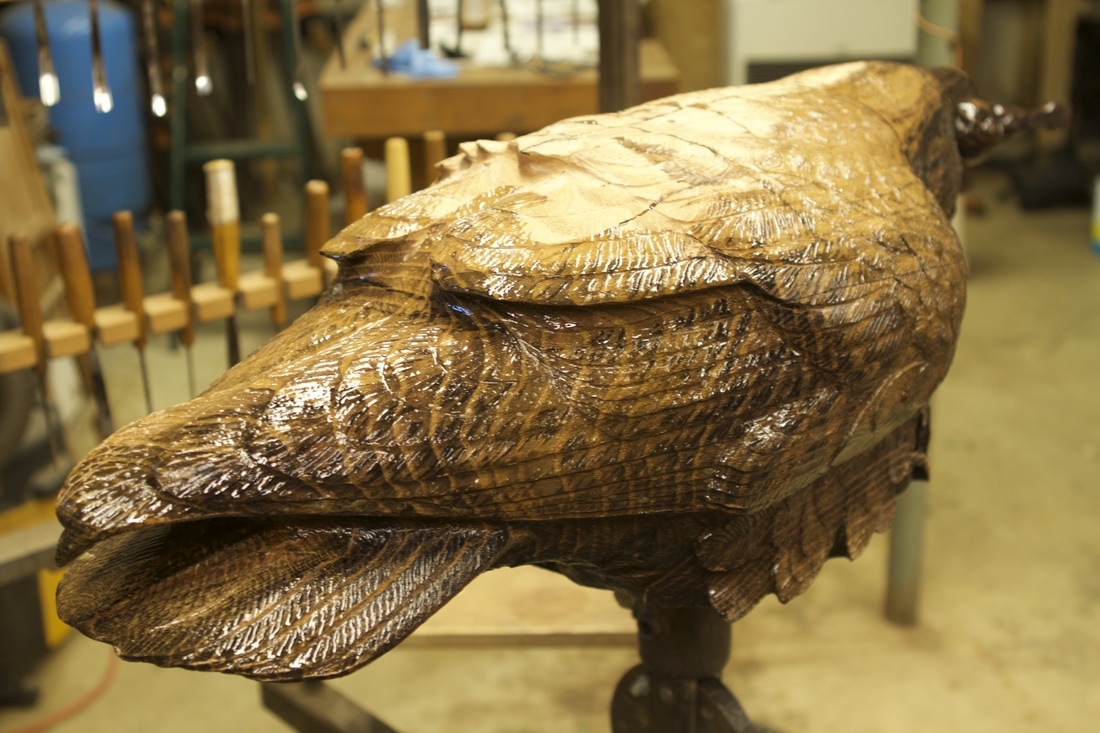 Always a very exciting moment in the making of a wood sculpture.....putting the finish on! Here I am applying the first coat of iron acetate to the carving. It began turning dark within a minute or so...a nice quick transformation! I kept brushing the iron acetate on, giving it a good soaking, then wiped off the surface and let it dry out overnight. The next day, I repeated the process. 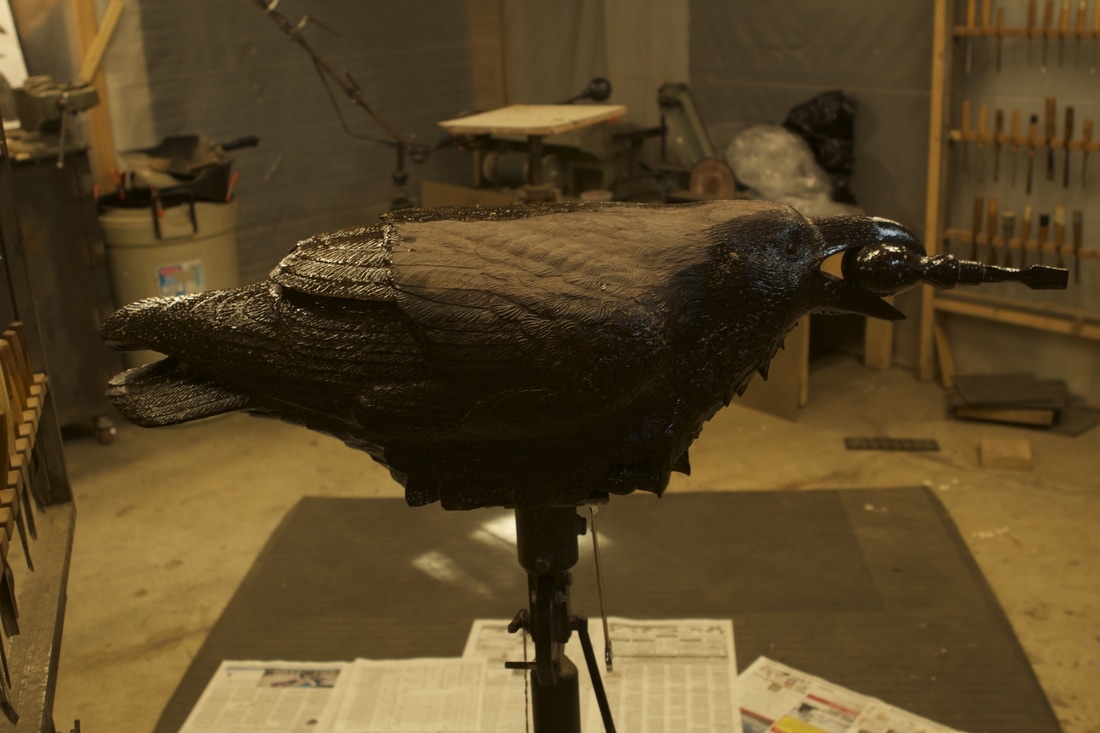 And here I am brushing on the first coat of my linseed oil finish...boiled linseed oil thinned out with an equal amount of turps. Again, I brushed on the oil repeatedly, and the oak kept on soaking it up....amazing how much it absorbed. Then, I wiped it all down and set it aside to dry. When it felt dry to the touch, I repeated the process again.  Just as a print or painting tends to look better for display when it is nicely framed, sculpture that is displayed nicely looks better. Sometimes that means on a pedestal, where it can be brought up to the right height. And a pedestal also acts like a picture frame in a way, highlighting the art and separating it from its surroundings . So here, I am making a pedestal for my raven carving (Still have not thought of a title!) 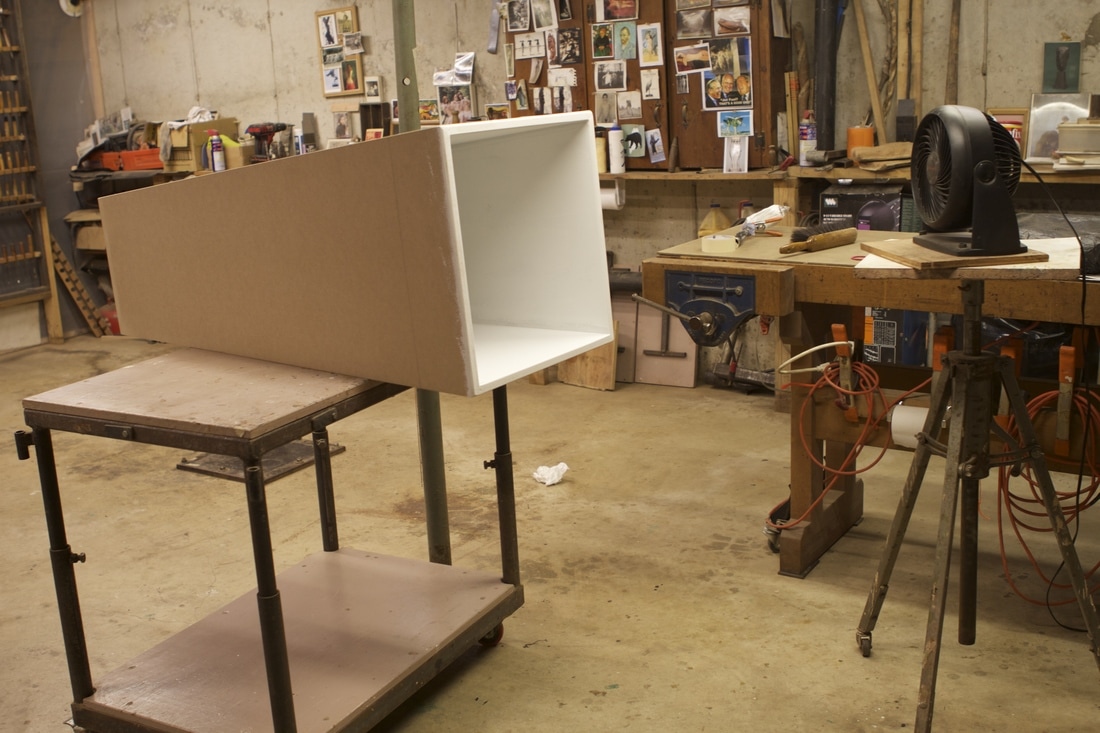 As the making of one of these pedestals creates an enormous amount of fine dust, I previously removed the oiled carving to a different part of my studio to finish drying. Here, the dusty work has been finished, the studio cleaned up a bit, and the pedestal is getting its first coat of primer on the inside. More painting to come....
 The end is near! Here, as you can see, I have signed the Raven sculpture.  I carved a number of pieces of red oak from the same log that the Raven is carved from, to be used as test pieces for different finishes. One of the first things I think of, when I think of ravens, is their beautiful black or deep brown color. Oiled red oak is beautiful...but it doesn't make me think raven, so I decided to look into ebonizing the oak. Looking on the internet, I found a number of things on using iron acetate to get that deep, dark color, so I decided to try it. It is made simply by placing fine, de-oiled steel wool into a vented jar of vinegar, and letting it sit a while. The steel wool is dissolved by the vinegar, and after straining it through a coffee filter to get the undissolved stuff out, it can be brushed onto your wood, with an almost immediate change in the wood color. It works best with woods high in tannin, and oak is one of those woods. It works by creating a chemical reaction inside the fibers of the wood, so the color is not just changed on the wood surface, but in the wood as well. I also tried using India ink. The piece above on the left is done with India ink, one coat on the lower half, and two above. The piece on the right side has been done with the iron acetate. As I also needed to seal the oak, aside from just coloring it, I applied my usual mix of boiled linseed oil cut 50% with turps. 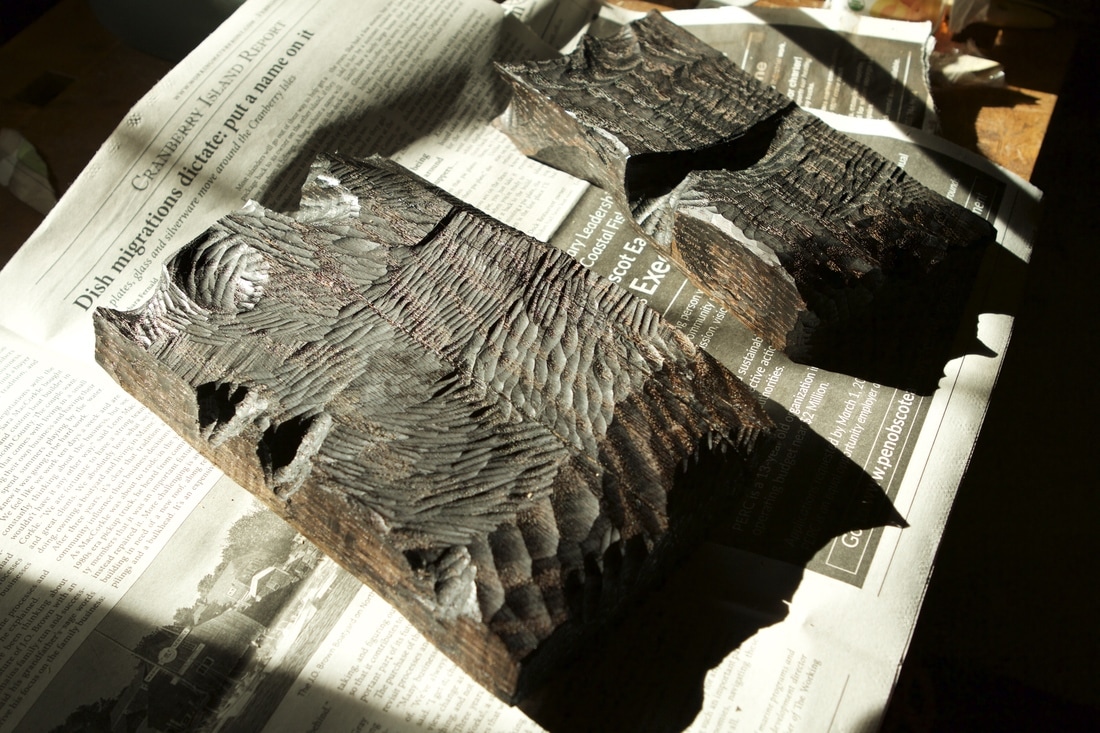 The piece on the left was also done with iron acetate, but coated afterwards with several coats of Antique Oil, which I also use to finish my wood carvings from time to time. 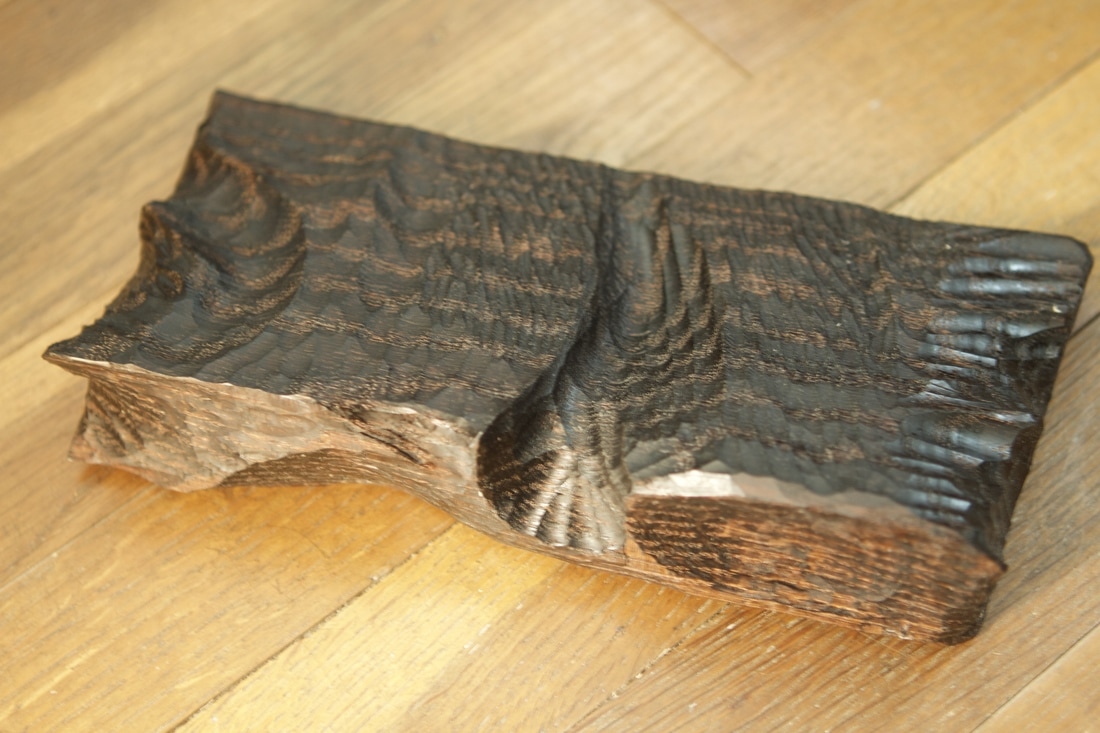 I really like the effect created by the iron acetate, top-coated with the linseed oil mix. I also liked the India ink, but in the end, I felt it covered up too much of the woodenness of the piece, being so opaque. I like the way the iron acetate with linseed oil turns the oak a beautiful dark brown while at the same time letting the grain show through, and so I think I will be going with that to finish my Raven. Still have to think of the title!
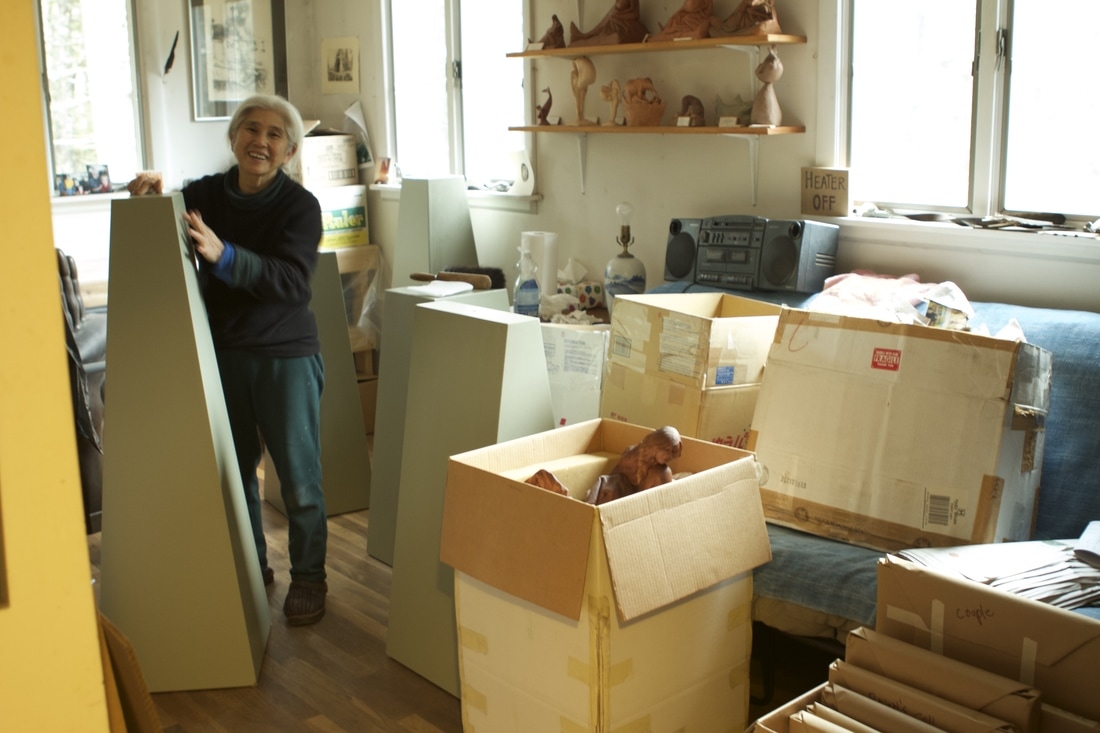 Well the opening at the Green Lion Gallery show, which took place on February 3rd, has long been over. Alas, I have no photos from the opening, as I made the mistake of neglecting to bring a camera....but here is one of getting ready to deliver the artwork down to the show. Thats Akemi helping to clean the pedestals. 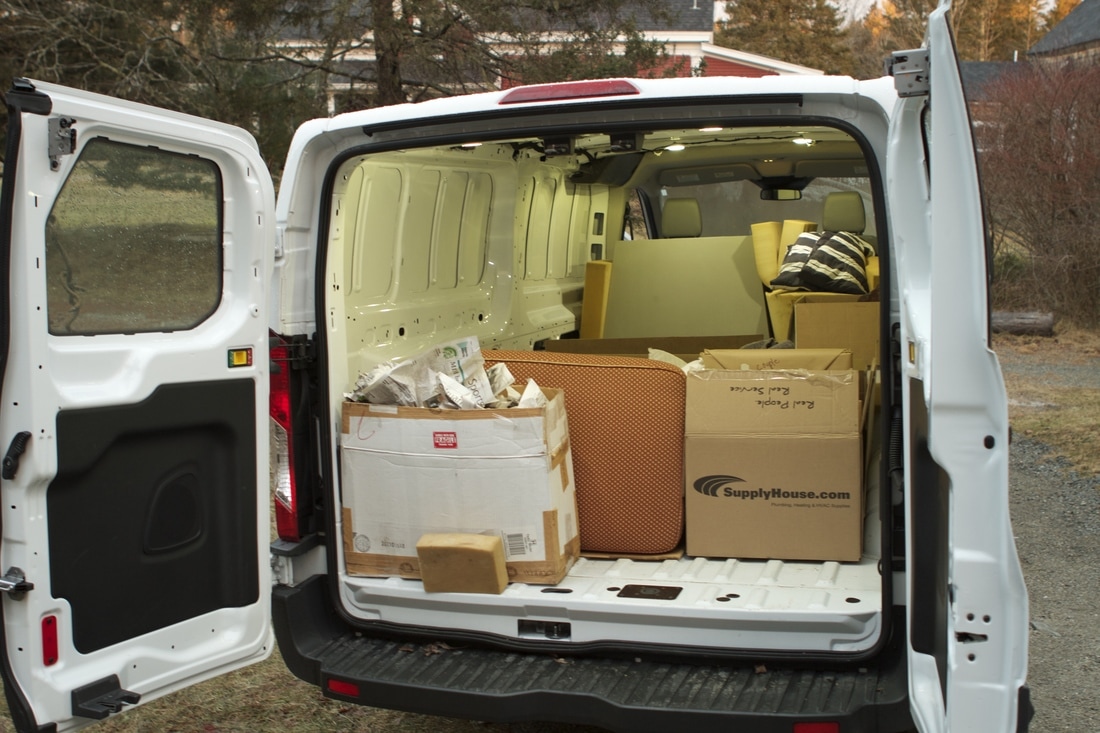 Here, loading the van is almost finished. 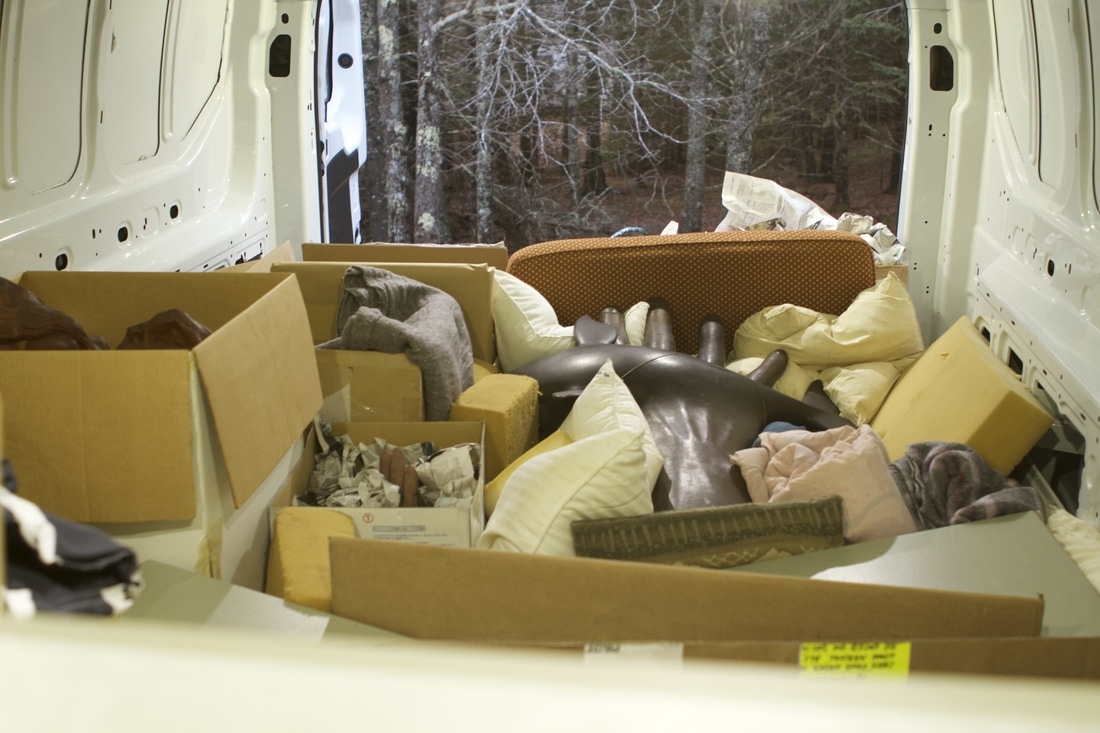 It is a big cargo van, and it was packed pretty full with pedestals, sculpture, and framed prints. Sculptors can't really have too many blankets, pillows and chunks of foam! Like I mentioned, I didn't get any photos of the opening...but it was well attended, and very enjoyable.
|