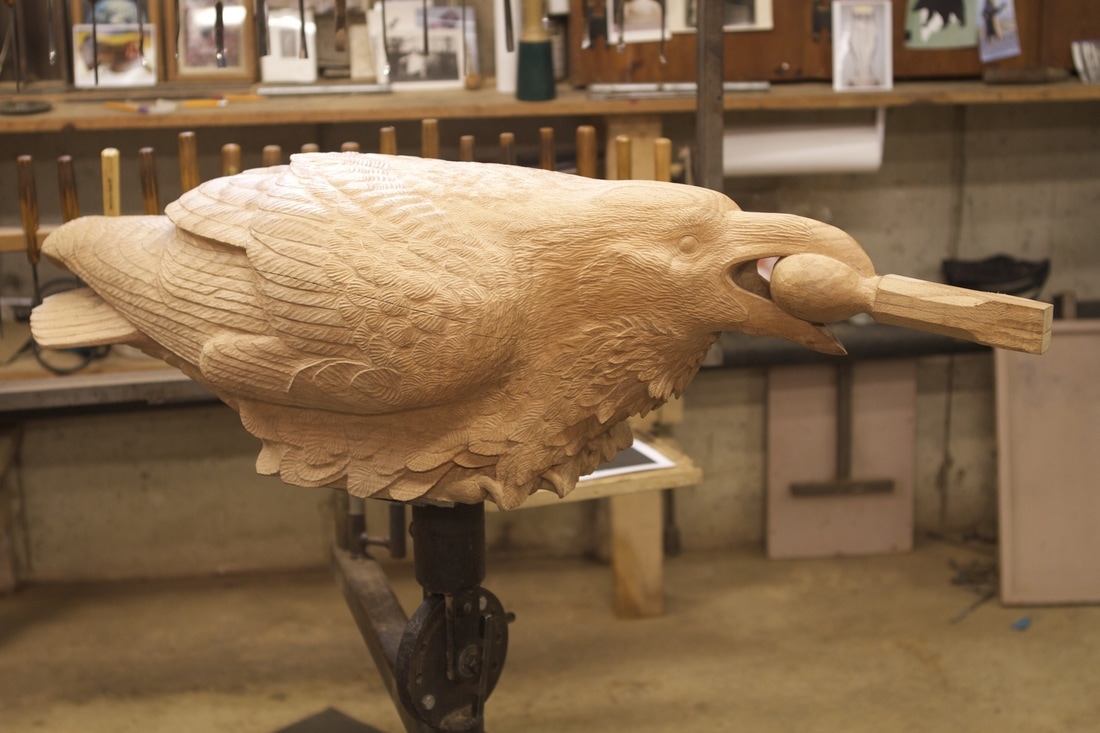
Well, I guess its been a while since my last post. Its been a busy time for me, and one of the things I have been busy with is getting back to my raven carving!
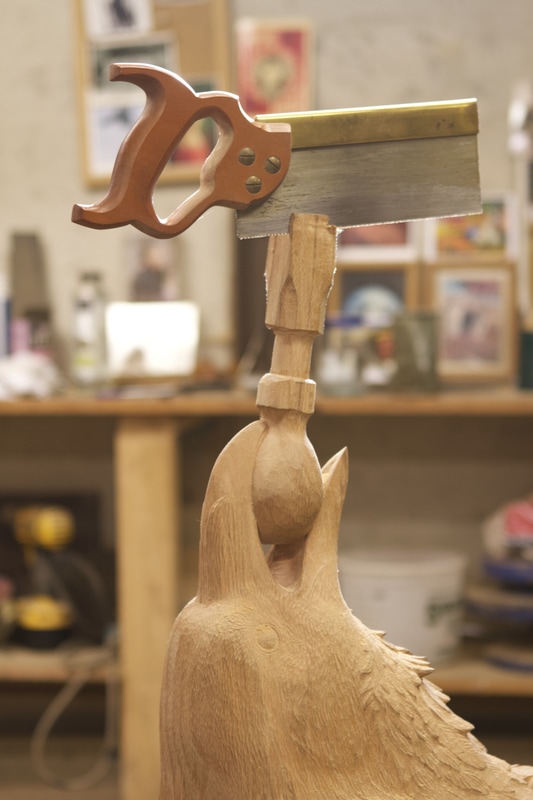
It was time to further define the screwdriver this bird is holding in its beak. I wonder what its doing with that screwdriver?
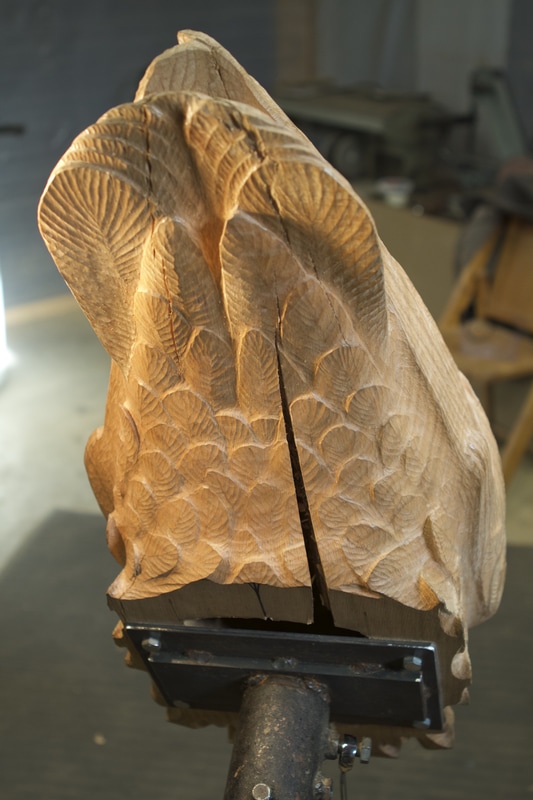
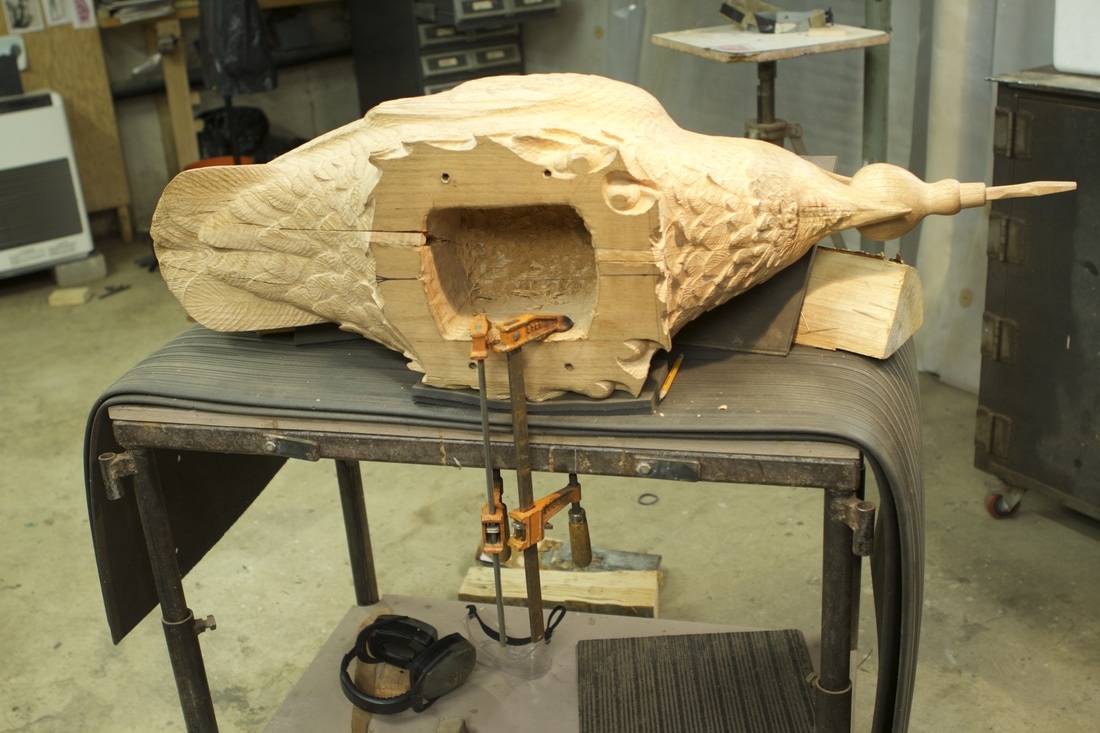
Then there is also the question as to what to do about the large check, or crack, that runs along the bottom of the carving. It has been there since before I started carving the log. Its what happens when a large diameter log starts drying out. As I mentioned in a previous post, I had hollowed out the log somewhat in the base in an attempt to try to keep the check from opening up much further. But the check is there, and the question is, what do I want to do about it? I could either leave it as it is, or try to fill it.
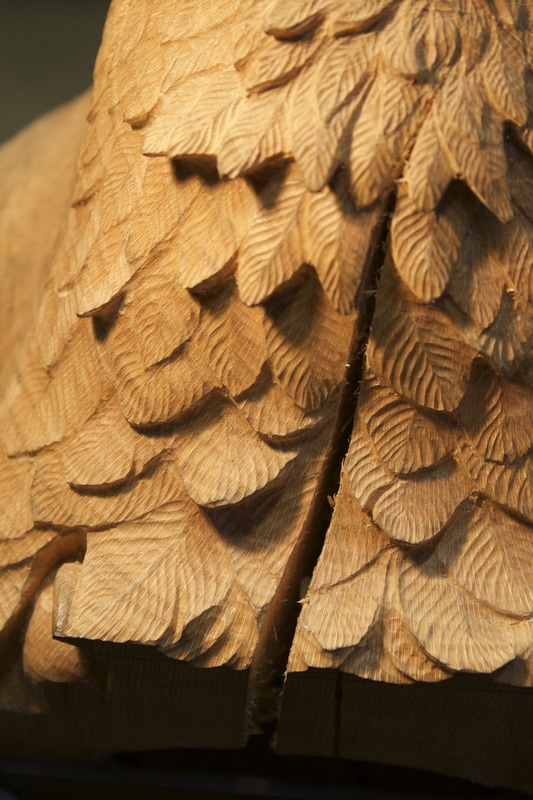
Here is the same check, running along the front of the sculpture, up towards the raven's neck. I decided to fill the check by inserting wedge shaped pieces of oak and gluing them to one side of the check. By gluing it to only one side, it allows the check to continue to move if that is what it wants to do. Were I to glue it on both sides, it would likely crack again, as wood, by nature, just wants to move. But before making the wedges, I first needed to chisel out the check and make it so that I could get nice clean seams.
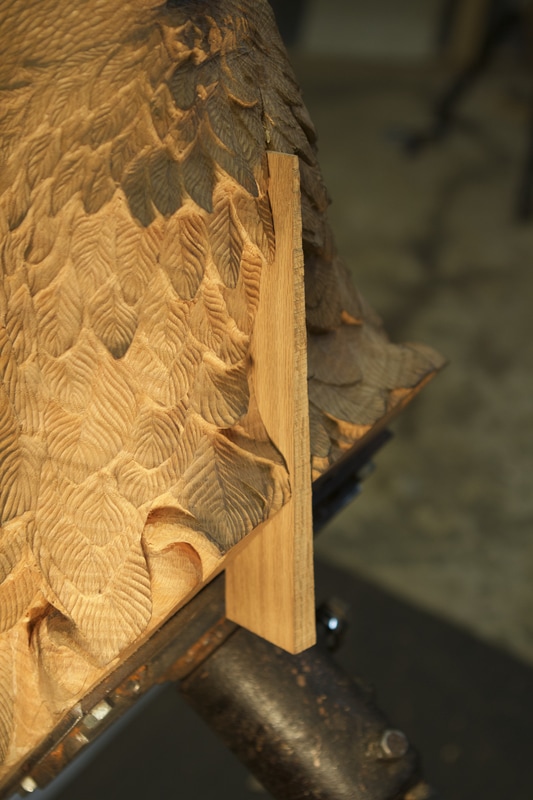
Its a bit of a project making a wedge to fit tightly into the check. Here, the wedge is tested, without any glue. After a number of adjustments, I finally get a good fit.
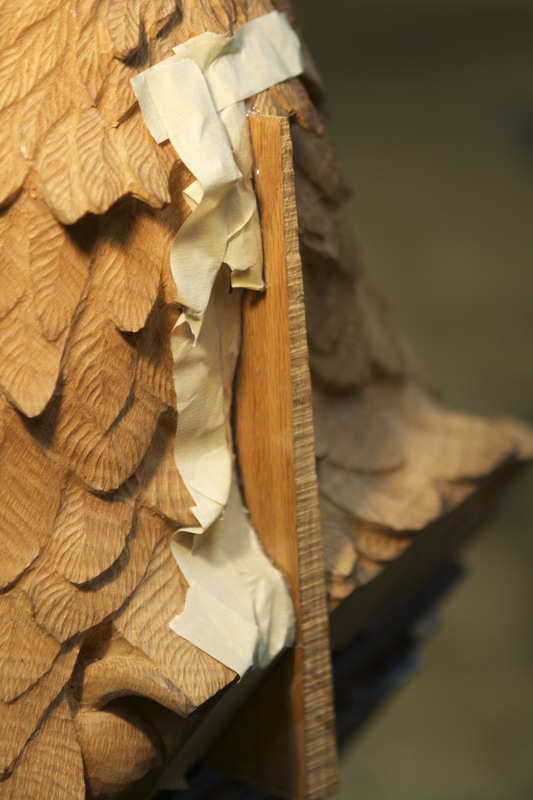
The wedge is glued into place. The masking tape is there to protect the carved area next to the seam from getting covered by any glue that is squeezed out of the seam.
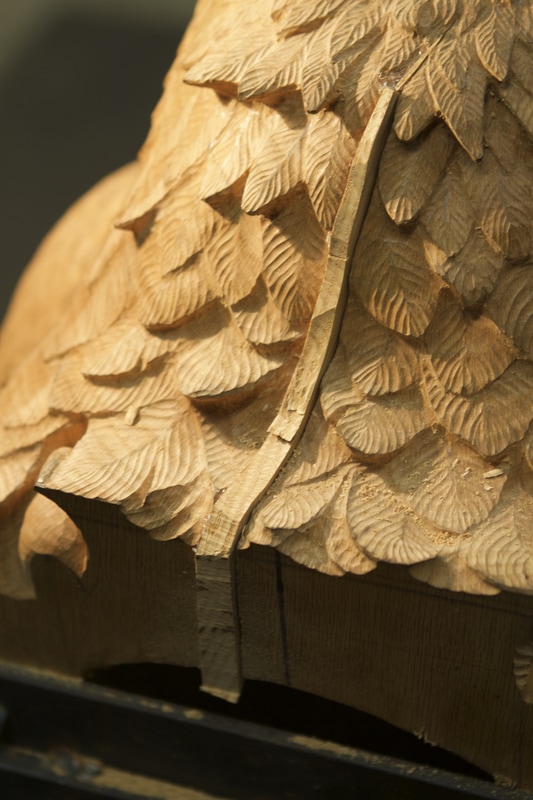
After the glue sets, I begin to carve the wedge...
The one large check running along the bottom of the sculpture has now been filled, as you can see in this photo.The time has now come to remove the carving stand base plate so that I can carve areas near the base that were covered by the plate. The carving process is nearing completion...